How to…Paint the Queen – Initial sketch

How to paint the Queen?! I don’t even know how it happened, but as I just stumbled across a series of progress photos…..

Well, we had just spent a wet weekend in June, waving wet Union Jacks from a wet bridge at lots of wet people as they passed by in, on and around boats of varying degrees of wetness. Then, one minute I’m drawing David Beckham (just for fun, you understand, not personal pleasure) the next I’ve been talked into painting a portrait of HRH Queen Elizabeth II. Caught up in the sentiment of the whole Diamond Jubilee thing I was challenged by my niece to enter (with her) the Daily Mail’s portrait competition. The rest, as they say, was history…though I don’t think my niece quite got round to paint the queen – I guess her portrait is still history in the making!

Queen or just plain commoner (it’s all the same in the end), painting a portrait is quite a difficult thing in my opinion. Whether it’s of a person or an animal, in the end it has to look “right”, especially if someone has commissioned the piece. That’s not to say it has to look exactly like a person or animal in all respects, like a photo would, but this is one area in painting where the end result has to capture the essence of the subject. OK, so it is only my opinion, but if you set out to paint a well known figure like the Queen, most people will know if you’ve got it drastically wrong – I guess Picasso might disagree, or perhaps he just knew some really weird looking people.

So I have already assumed it’s unlikely she will sit for me and picked a favourite from the endless stream of pictures from recent events – it has to be one where she’s smiling for me! I have both a colour and a black and white copy (B&W makes it easier to understand the tonal values of the picture i.e. lights and darks, without letting colour confuse my eyes).

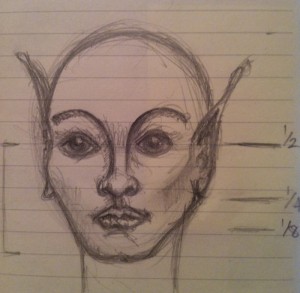
I’m also armed with my mental picture of the general anatomy of the human face and head. You might notice this is my slightly stylised version (I’m not suggesting HRH is a fairy or from the planet Vulcan – I just can’t help but doodle). This age old proportional information is what I was taught at school and I’ve applied it many times since:

image showing the proportions of the human face

1. Head = upside down egg

2. 1/2 way down = eye line

3. 1/2 way again = nose line

4. 1/2 way again = mouth

5. Eyes = 1/5 of width of face & 1 eye width apart

6. Nose = 1 eye width wide


It’s important to bear in mind that this “rule of thumb” information can only provide a starting point for any portrait helping to get things in roughly the right place. After that our observational skills have to pick up the characteristics that reflect the unique differences that make a particular individual i.e.gender, race, age etc.

So, back to my challenge to paint the Queen…..

Step 1 – Outline measurements

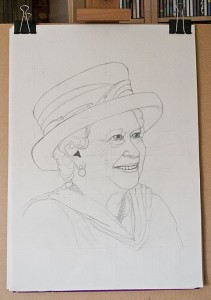
Outline pencil sketch of the Queen

I’m normally quite loose in the way I work, but for this exercise I meticulously measure and plot out the various angles in the image (you can make these out in the preliminary sketch) and the comparative dimensions of the face e.g. how many eyes wide is the face, lips etc.

I plot these out on a sheet of cartridge paper, along with an outline of the key features I want to incorporate in the finished picture. I also multiply measurements to increase the scale of the picture to something just about life size on the canvas. In no time at all I have my outline sketch.

Step 2 – Transfer to Canvas

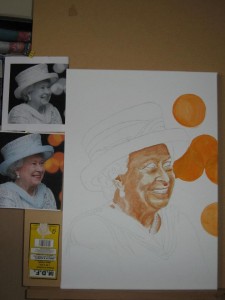
I prefer to make any significant changes to the composition at this stage rather than after I’ve transferred the image to canvas, mainly because it’s much easier to adjust minor errors on paper! The hard work already done to adjust the image and increase the scale I can now simply trace the key elements of my sketch to and transfer the important reference points to my canvas. After marking the key elements I work to join the dots, just like in the puzzles I did as a kid – the key to success is identifying the right points and transferring them across. This time I used       a fine pencil to mark out my subject, ready to accept the first layer of under-painting:

Outline sketch of the Queen on canvas

3. Ready to paint the Queen…..

Next time I’ll outline my approach to under painting, the techniques and colours used to provide the foundation layers for the painting. In the meantime you could have a go at creating your own outline portrait. Any photograph would do for practice or you could try using a mirror and make it a self portrait!

HELP! Take me to Part 2 | Part 3

Waxing lyrical – Encaustic part 2

“I’m running a part 2 workshop…” Brian said “are you interested?”

“Am I…sign me up!” I replied

And so I came to be sat in the Encaustic Art Plus workshop (part 2) on a beautiful autumnal monday…did you know, as cold as it is, that winter doesn’t officially start until the winter solstice 21st December?!

I digress…back to Elsecar Heritage Centre, green “pinnie” neatly tied behind me, warm iron waiting and lots more vivid colours calling me from the tin I’m awaiting first instructions from Brian Nelson once again…..

Today’s workshop will build on skills we learned previously and explore other methods and techniques that can be combined to introduce variety to our encaustic painting. We’re going to use stamping and hotplate techniques and I’m excited by the sight of a nugget of gold beeswax lurking toward the edge of the tin…..

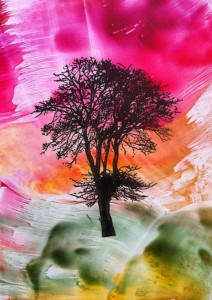
Encaustic Painted Tree

Encaustic Tree

First up, tree inked, stamped and “fixed” with beeswax before overpainting  with the liquid gold that appears as I place my nugget on the iron. My encaustic tree grows beneath something resembling the Aurora Borealis.

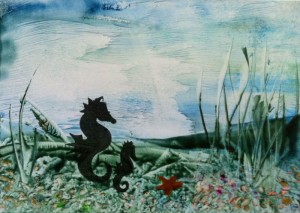
Encaustic painted seahorses

Encaustic Seahorses

A slight change in direction and we’re off to the depths of the ocean. The stylus tool picks out the detail of the ocean floor and a solitary star fish.

Something slightly different next…we dismantle our irons and with all the anticipation and excitement that comes with a child’s Transformer toy they become a personal hotplate.

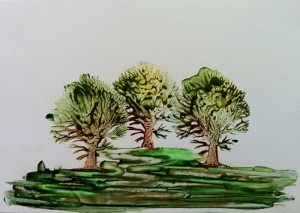
Encaustic painted Forest of three trees

Encaustic Forest

The play of beeswax on the heated surface of the card presents new opportunity and challenge in equal measure.

The introduction of a “palette” to paint from as melted beeswax is transferred via stamps to a second card…reheated to create an opportunity for a wax-drawn forest floor beneath the broccoli like trees.

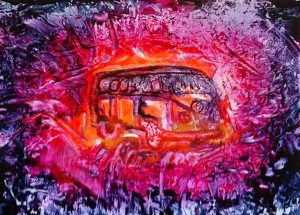
Encaustic painted VW

VW Heaven or Hell


A sheet full of vivid molten wax is transformed when introduced to another stamp…the iconic VW Camper emerges from the molten heat of Hell.

The versatility of this medium and the vibrance of the available colours have warmed another cold afternoon which has passed all too quickly.

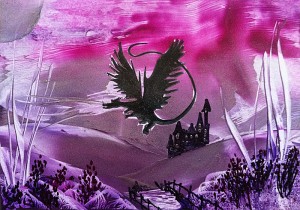
Fortunately there is just enough time left to consolidate all the tools and techniques we have worked with over the two workshops and create our very own encaustic masterpiece, so……………….. Here Be Dragons!

Fantasy landscape with dragon

Here Be Dragons

Thanks again Brian!!

Help! I missed Part 1

What is Art – L.S.Lowry? Happy 125th Birthday

“I am not an artist. I am a man who paints.”

So said the man who produced around 1,000 paintings and over 8,000 drawing during his lifetime. L.S.Lowry (Laurence Stephen in case you were wondering) has long been known for his industrial pictures of Manchester, where he was born and grew up, and specifically the matchstick people who inhabit them.

I have never really been a great fan of his work, possibly because of my own preference for realism or the extreme opposite surrealism. Lowry always struck me as just a little dull at the side of the vivid and imaginative works of so many other artists, such as Dali for example.

Then again, perhaps I was simply put off by the association of his art with the 1978 hit single “Matchstalk Men and Matchstalk Cats and Dogs” by Brian and Michael. Now, there was a song that seemed to spend an interminable amount of time in the Charts way back then, though strangely the reality is it actually only spent 3 weeks at no.1! Thank goodness they were a one hit wonder!

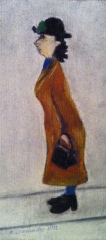
With the approach of his 125th birthday I thought it would be interesting to revisit my apparent negativity/disinterest. Among the pictures I could track down on line l was taken with this rather strange picture “Gentleman looking at Something (1960). I say “strange” because there is something quite unusual about a picture where the primary source of interest doesn’t appear in the picture…I want to know and can therefore only imagine what the “something” was. Perhaps he was watching an approaching tram, given that he is stood between it’s lines?

Reading a little further I am reminded by the Winsor and Newton site that Lowry used a very limited colour palette throughout all his paintings:

  • Ivory Black
  • Vermilion
  • Prussian Blue 
  • Yellow Ochre
  • Flake White

As I start to look more closely at the range of colour he achieves in his paintings I realise just how complicated things have become these days, with a vast array of colour tubes to select from, and very little idea about how some of them have been created! The subtlety and depth of colour achieved with this limited palette really is quite tremendous.

So, I can’t say I feel more excited by the art, but I am persuaded that there is something solid about the approach and something I might learn from that. Indeed, I already have thoughts in mind about painting next with a smaller range of colour on my palette.

In the meantime though – I’ll accept it’s art, think about arranging a trip to the Lowry in Salford, and wish Mr Lowry a happy 125th birthday with a small homage: “Lady looking at Something else.” I will leave you to determine what that something is…..