February Challenge (2012 revisited)

So 12 months on, we’re nearing the end of February 2013 and I can’t help but reflect on what I was doing this time last year….approaching the end of my “picture per day in February challenge”.

At the time I kept a small diary (in words as well as pictures) and note this particular entry:

It’s funny, but despite the fact I feel so energised when I am being creative, I seem to find so many reasons not to do it, or to put a lower priority on it than other things in my life. Despite my hope that I could generate a regular income stream I guess I am still persuaded by the notion of my art as a hobby, which pushes it behind housework, shopping and a whole myriad of other things on my “To do” list. I really do need to kick that one into touch!!

That in mind I challenged myself to produce an art work per day throughout February (2012). This would be a daily attempt to either create a new piece or complete one of the bits and pieces hanging around that had been started and never quite finished…I did manage to polish some of those off too!!

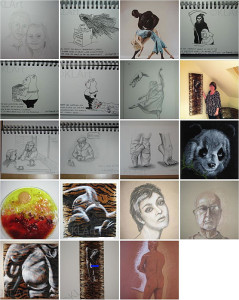
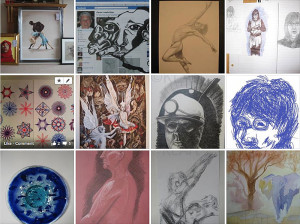
End result an assortment of images/items in a variety of media:

Images from the February 2012 Challenge Images from February 2012 Challenge Day19 - 29 February 2012 Challenge Day28

12 months later and I have adjusted my priorities to focus daily on my artwork in one form or another. Some days it’s a focus on the administrative stuff and tweaks to my website, others it’s researching opportunities and competitions and on the best days of all I listen to my music and paint or draw to my heart’s content on my latest commission or my next “big idea”. Whatever the day brings, though, I relish every opportunity to explore, learn and be creative and can’t help but think my February Challenge helped my focus and kicked some of the old doubts into touch!!

Some of these items (and lots of others) are still available to buy from the KL Art Shop if you’re looking for something a little bit different for Mothers Day (March 10th 2013).

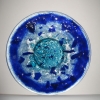
"Sunrise" Glass Plate


Giant Panda portrait


"Sailing" Glass Plate


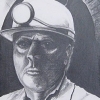
Portrait of a Pit Man with head lamp


How to…Paint the Queen – Initial sketch

How to paint the Queen?! I don’t even know how it happened, but as I just stumbled across a series of progress photos…..

Well, we had just spent a wet weekend in June, waving wet Union Jacks from a wet bridge at lots of wet people as they passed by in, on and around boats of varying degrees of wetness. Then, one minute I’m drawing David Beckham (just for fun, you understand, not personal pleasure) the next I’ve been talked into painting a portrait of HRH Queen Elizabeth II. Caught up in the sentiment of the whole Diamond Jubilee thing I was challenged by my niece to enter (with her) the Daily Mail’s portrait competition. The rest, as they say, was history…though I don’t think my niece quite got round to paint the queen – I guess her portrait is still history in the making!

Queen or just plain commoner (it’s all the same in the end), painting a portrait is quite a difficult thing in my opinion. Whether it’s of a person or an animal, in the end it has to look “right”, especially if someone has commissioned the piece. That’s not to say it has to look exactly like a person or animal in all respects, like a photo would, but this is one area in painting where the end result has to capture the essence of the subject. OK, so it is only my opinion, but if you set out to paint a well known figure like the Queen, most people will know if you’ve got it drastically wrong – I guess Picasso might disagree, or perhaps he just knew some really weird looking people.

So I have already assumed it’s unlikely she will sit for me and picked a favourite from the endless stream of pictures from recent events – it has to be one where she’s smiling for me! I have both a colour and a black and white copy (B&W makes it easier to understand the tonal values of the picture i.e. lights and darks, without letting colour confuse my eyes).

I’m also armed with my mental picture of the general anatomy of the human face and head. You might notice this is my slightly stylised version (I’m not suggesting HRH is a fairy or from the planet Vulcan – I just can’t help but doodle). This age old proportional information is what I was taught at school and I’ve applied it many times since:
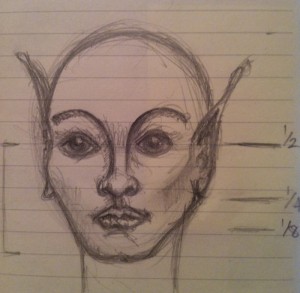
image showing the proportions of the human face

1. Head = upside down egg

2. 1/2 way down = eye line

3. 1/2 way again = nose line

4. 1/2 way again = mouth

5. Eyes = 1/5 of width of face & 1 eye width apart

6. Nose = 1 eye width wide


It’s important to bear in mind that this “rule of thumb” information can only provide a starting point for any portrait helping to get things in roughly the right place. After that our observational skills have to pick up the characteristics that reflect the unique differences that make a particular individual i.e.gender, race, age etc.

So, back to my challenge to paint the Queen…..

Step 1 – Outline measurements
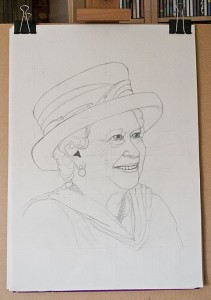
Outline pencil sketch of the Queen

I’m normally quite loose in the way I work, but for this exercise I meticulously measure and plot out the various angles in the image (you can make these out in the preliminary sketch) and the comparative dimensions of the face e.g. how many eyes wide is the face, lips etc.

I plot these out on a sheet of cartridge paper, along with an outline of the key features I want to incorporate in the finished picture. I also multiply measurements to increase the scale of the picture to something just about life size on the canvas. In no time at all I have my outline sketch.

Step 2 – Transfer to Canvas

I prefer to make any significant changes to the composition at this stage rather than after I’ve transferred the image to canvas, mainly because it’s much easier to adjust minor errors on paper! The hard work already done to adjust the image and increase the scale I can now simply trace the key elements of my sketch to and transfer the important reference points to my canvas. After marking the key elements I work to join the dots, just like in the puzzles I did as a kid – the key to success is identifying the right points and transferring them across. This time I used       a fine pencil to mark out my subject, ready to accept the first layer of under-painting:
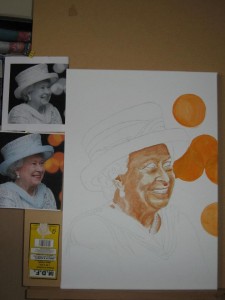
Outline sketch of the Queen on canvas

3. Ready to paint the Queen…..

Next time I’ll outline my approach to under painting, the techniques and colours used to provide the foundation layers for the painting. In the meantime you could have a go at creating your own outline portrait. Any photograph would do for practice or you could try using a mirror and make it a self portrait!

HELP! Take me to Part 2 | Part 3

Life Drawing Adventures 1

Hurrah! It’s here! Saturday morning and I have a lovely day lined up in a pub in Wakefield. This isn’t going to be like any other day or evening in a pub, where I force myself to imbibe far more alcohol than is good for me, but a life drawing day!

OK, so I am looking forward to having a pint with lunch, but the focus of the day is a luxurious 6 whole hours of life drawing. I haven’t been doing this for long – it’s something I started when I left my job last year, and it’s something I’ve really enjoyed since I decided to give it a try.  It’s strange how people react when you say you’re off to do some life drawing – odd, “knowing” looks and sideways glances and questions like “ooh, aren’t you embarrassed” and “what’s it like”?

What it’s like is a whole day of quiet contemplation – two models, great lighting, a little chit-chat early on and over lunch, but otherwise a peaceful day stood at the easel, listening to quiet music on my i-Pod as I draw what I observe.  OK, so it starts a little less quietly…easel legs creaking into position, pencils rattling and rasping as they are sharpened in eager anticipation, masking tape gently tearing as paper supports are quietly taped to drawing boards and water quietly stirred in jars as everyone sets up their own work space There is something very peaceful and serene about the room once the initial set up is complete.

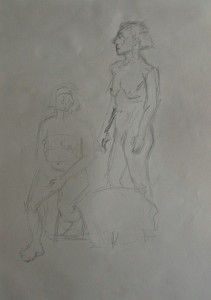
We’ll start with two quick warm up sketches – there is a flurry of activity as the models adopt their first pose and we have 10 mins to “get our eye in” and persuade any tension to leave our bodies to create the space for our creativity to enter.

I start left-handed – my non-domminant hand. The results are “interesting” – out of proportion, crude and quite ugly, but Im already starting to relax and I feel some sense of creative emotion is released in me.

Female nudes sketch 1

Female Nudes sketch 1

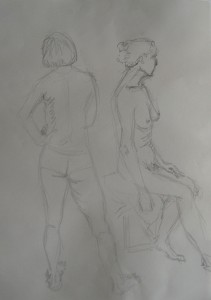
Feeling more relaxed I attach a second sheet to my easel for the second pose – again we have ten minutes to capture the essence of this pose and the juxtaposition of our two models.

Female Nudes sketch 2

Female Nudes sketch 2

Working right-handed this time I’m feeling much more comfortable and confident already. The result this time is a much better proportioned picture and a sketch I will undoubtedly refer to again at some point in the future when looking for inspiration in my painted work. The outside world is almost disappearing completely except for the warm glow of an autumnal sun that brings a halo highlight to the models and a stark contrast of tonal values.

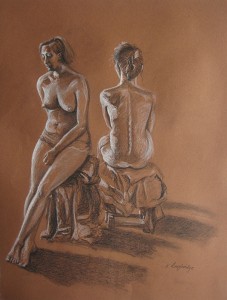
I set myself up for the longer pose that will last for the rest of the day. I love the light texture to the surface of my pastel paper and the warmth of the brown sheet I select from my portfolio.  A close squint at the scene before me and I am able to pick out and capture the deep tonal values with my dark charcoal and the highlights with a white charcoal pencil. Very quickly the scene before me starts to emerge loosely from my paper. Key lines noted in outline I have captured the scene and lunch beckons, including a refreshing pint!

This short break presents a chance to reflect and my decision is made…I will focus on working the detail in this picture for most of the rest of the day. Usually sessions become a race against the clock, but today’s session presents this rare luxury of an opportunity to work a picture with a finer level of detail. The afternoon passes by with relaxed satisfaction and I create a picture that captures the mood and I feel proud of…

Image of two female nudes seated

Two Female Nudes, seated £45.00