How to paint the Queen?! I don’t even know how it happened, but as I just stumbled across a series of progress photos…..
Well, we had just spent a wet weekend in June, waving wet Union Jacks from a wet bridge at lots of wet people as they passed by in, on and around boats of varying degrees of wetness. Then, one minute I’m drawing David Beckham (just for fun, you understand, not personal pleasure) the next I’ve been talked into painting a portrait of HRH Queen Elizabeth II. Caught up in the sentiment of the whole Diamond Jubilee thing I was challenged by my niece to enter (with her) the Daily Mail’s portrait competition. The rest, as they say, was history…though I don’t think my niece quite got round to paint the queen – I guess her portrait is still history in the making!
Queen or just plain commoner (it’s all the same in the end), painting a portrait is quite a difficult thing in my opinion. Whether it’s of a person or an animal, in the end it has to look “right”, especially if someone has commissioned the piece. That’s not to say it has to look exactly like a person or animal in all respects, like a photo would, but this is one area in painting where the end result has to capture the essence of the subject. OK, so it is only my opinion, but if you set out to paint a well known figure like the Queen, most people will know if you’ve got it drastically wrong – I guess Picasso might disagree, or perhaps he just knew some really weird looking people.
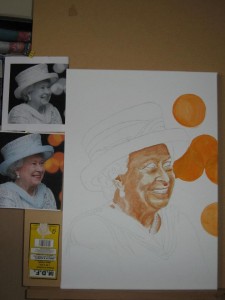
So I have already assumed it’s unlikely she will sit for me and picked a favourite from the endless stream of pictures from recent events – it has to be one where she’s smiling for me! I have both a colour and a black and white copy (B&W makes it easier to understand the tonal values of the picture i.e. lights and darks, without letting colour confuse my eyes).
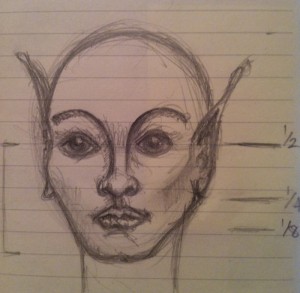
I’m also armed with my mental picture of the general anatomy of the human face and head. You might notice this is my slightly stylised version (I’m not suggesting HRH is a fairy or from the planet Vulcan – I just can’t help but doodle). This age old proportional information is what I was taught at school and I’ve applied it many times since:
1. Head = upside down egg
2. 1/2 way down = eye line
3. 1/2 way again = nose line
4. 1/2 way again = mouth
5. Eyes = 1/5 of width of face & 1 eye width apart
6. Nose = 1 eye width wide
It’s important to bear in mind that this “rule of thumb” information can only provide a starting point for any portrait helping to get things in roughly the right place. After that our observational skills have to pick up the characteristics that reflect the unique differences that make a particular individual i.e.gender, race, age etc.
So, back to my challenge to paint the Queen…..
Step 1 – Outline measurements
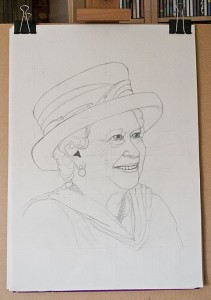
I’m normally quite loose in the way I work, but for this exercise I meticulously measure and plot out the various angles in the image (you can make these out in the preliminary sketch) and the comparative dimensions of the face e.g. how many eyes wide is the face, lips etc.
I plot these out on a sheet of cartridge paper, along with an outline of the key features I want to incorporate in the finished picture. I also multiply measurements to increase the scale of the picture to something just about life size on the canvas. In no time at all I have my outline sketch.
Step 2 – Transfer to Canvas
I prefer to make any significant changes to the composition at this stage rather than after I’ve transferred the image to canvas, mainly because it’s much easier to adjust minor errors on paper! The hard work already done to adjust the image and increase the scale I can now simply trace the key elements of my sketch to and transfer the important reference points to my canvas. After marking the key elements I work to join the dots, just like in the puzzles I did as a kid – the key to success is identifying the right points and transferring them across. This time I used a fine pencil to mark out my subject, ready to accept the first layer of under-painting:
3. Ready to paint the Queen…..
Next time I’ll outline my approach to under painting, the techniques and colours used to provide the foundation layers for the painting. In the meantime you could have a go at creating your own outline portrait. Any photograph would do for practice or you could try using a mirror and make it a self portrait!
HELP! Take me to Part 2 | Part 3


