Diary of a large acrylic painting – Part 3

Step 7 – large acrylic painting taking shape and texture (and just a little colour?)

Ok, so the floor’s finished and I must now find a way to create the various shades and textures of black that appear in other areas of the kitchen.

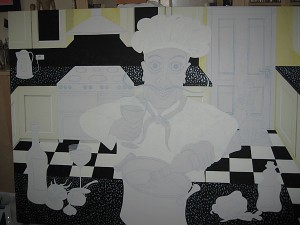
“Salvatore, I’d like to introduce you to Glaze Medium and pearlescent paint, as well as the colours I’ll be adding to separate my blue black gloss-painted kitchen door from the fluorspar flecked charcoal grey black of the worktops and the metallic shiny black of the oven…..” (Yes, I have also developed the rather odd habit of talking to my painting throughout the course of my working day).

A bit experimental, but I’m using a pearlescent medium, combined with a very pale grey paint to under-paint the kitchen work tops and create the fluorspar flecks in the granite.

Salvatore painting with painted kitchen walls and worktops

“Salvatore’s” temporarily spotty kitchen worktops

These will disappear later as I overpaint with darker glazes and dance as they catch the light in the finished painting, but in the meantime it does look rather strange and I have to trust the experiment will work at the time of painting!

The kitchen cupboards prove easier to assemble than an Ikea flat pack and it’s quite nice to have laid some colour on the walls too!

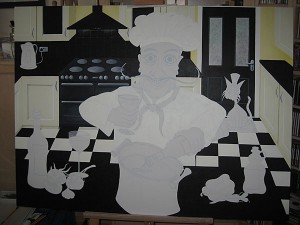
Step 8 – My approach has worked even better than expected so far…

"Salvatore" receives his kitchen appliances

Salvatore takes delivery of his kitchen appliances

and I’m getting quite excited as I add more features to the room, including the appliances and a hint of colour behind the the frosted windows in the door.

The reflected light of the cooker hood is achieved with a dry brush technique over a glazed black wall.

Each completed piece of background brings me closer to the fun stuff in the foreground (why do I always feel like this like this when I’m painting?).

Salvatore is starting to adopt a slightly ivory attitude now too and I’ve reached the point where the picture now makes it’s own argument for the addition of at least a small amount of subtle colour so it’s time to call in my pals for another discussion about our colour palette…

Fortunately, my pals agree with me……..woohoo!!!! Now, where did I put those paints?

You can see the finished colours in all their glory in the KL Art Gallery.

Diary of a large acrylic painting – Part 2

Step 5 – Design approved, I’m ready to eat my elephant – here comes the very large acrylic painting…

Large canvas fixed firmly to my easel and gesso primed (I always like to be sure by adding a couple of layers of my own gesso primer, even if they come factory primed) I will scale up my outline sketch from A4 (ish) to A0 size.  That’s increasing the size by at least 4-ish times the original.

I remember how, as a child, I would copy pictures in colouring books from one page to another by copying one square at a time from the grid that had been superimposed on the original (with mixed success in the early days and some improvement later on).

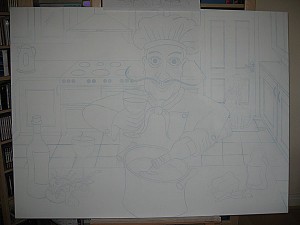
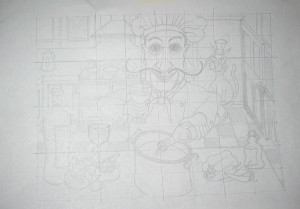
Salvatore outline on canvas

Salvatore outline on canvas

Adopting the same methodology, scaling up by a factor of 4 as I go, the sketch is relatively easily transferred to my large canvas using a blue acrylic painted outline.

I selected blue, not simply because it’s my favourite colour, but also because it will provide a good contrast beneath/alongside the layers of neutrals tones I will be painting with very soon.

The picture looks great on its new support, though it’s also strangely daunting now I realise just how much I have to paint to deliver the original design. I hope I have enough paint…this really is a large acrylic painting!!

Step 6  – Breathe deeply and start painting!

My excitement about dealing with the chef and some of the things he is going to cook has to be put aside for now. That’s where I’m allowed the introduction of a small amount of colour, and everything will start to come to life, but for now though, like all good paintings, this one will start with the background.

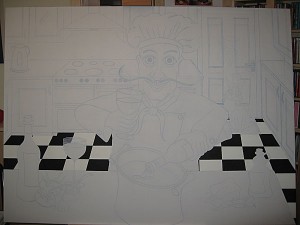
Salvatore painting with floor painted

“Salvatore” finds his feet – tiled floor emerging

Starting with the background helps to create the impression that everything is sitting in the right place. I’m going to paint items as though I was building the room, so floor first should ensure that everything else sits properly on top of it and supports the correct sense of perspective. This should mean my chef will “stand” in the middle of the painting in due course both composition and perspective-wise.

Now then, who decided on a checkerboard tiled floor for goodness sake!?

If you’re just too excited to wait for the next instalment you can check out the finished painting in my KL Art Gallery.

Diary of a large acrylic painting – Part 1

“We want something large and neutral, a large acrylic painting, for that really big empty wall in our kitchen” they said…

“We’ve seen some things we like by a Canadian guy …..we love them but everything he does is bold and bright so not really our sort of colours…can you help? Do you do commissions?”

Step 1 – Research the work of said Canadian guy for an idea of style. Will Rafuse does some fabulously vibrant and fun stuff and in a style not dissimilar to some of my early work.

Step 2 – Kick around a few thoughts about developing a picture that incorporates my pals’ kitchen, ask lots and lots of questions and discuss neutral colour schemes (I’m not sure whether to call these my limitations or opportunities at this stage)…

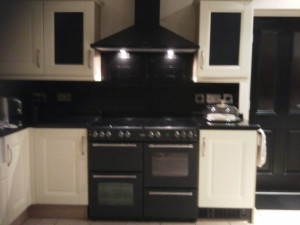
Kitchen Photograph

Kitchen Shot

Step 3 – Visit and take photos of said kitchen, from and including the big blank wall where the acrylic painting will eventually live – it’s going to be pretty big!

I’m fully armed with outline requirements, buzzing with enthusiasm, not least because it’s so much bigger than anything I’ve done before…we’re ready to develop some sketched mock ups.

Step 4 – Good old fashioned pencil and paper put hard to work, I mock up a few possible options, gather colour samples to establish the range of my allowable palette and develop my argument for extending this to allow at least a few small items to be given some colour for balance.

And the winner is…..

Sketch for "Salvatore Cooks For" Acrylic Painting

Sketch for “Salvatore Cooks For…” Acrylic Painting

Salvatore, who will cook for my pals in their kitchen, once complete.

Time to buy a very large canvas, 48 X 36 inches no less, work out how to stop it rocking on my easel and find a suitable approach for transferring the approved outline to the canvas.

Just like eating an elephant it must be done one chunk at a time…..

You can check out the end result in my KL Art Paintings Gallery.